|
|||||||||||||
|
|
|
|||
|
|
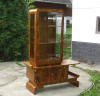
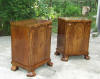
Latest additions of Art Deco Furniture at Hungary4deco. |
|
Click on the thumbnail photo below to view each piece. |
|
|
|
|
|
|
|
|
|
|
|
|
|
Birch is much used for staining a mahogany colour. Beech is also employed for the same purpose. Deal provides an excellent material for imitating plain walnut. Cherry, holly, pear, and hazelwood, when stained, afford good ebony effects. American whitewood is a valuable staining wood on account of its freedom from knots.
Preparing Wood For Staining. As already said, the surface of the wood to be stained should be smooth. If possible, any knots should be cut out and replaced with pieces of the same material. To make the wood perfectly smooth give it a rub over with No. o glass-paper. This must be done with as long sweeps as possible, and the rubbing should be done in the same direction as the grain. If there are any dirt or grease marks left after the application of the glass-paper, these may be removed by rubbing with a rag dipped in benzine.
If the wood is of poor quality and is porous. Either the whole surface, or large patches of it – glue size should be applied. This is cheap, and can be procured anywhere. The size should be of medium strength, otherwise it may cause the finishing coats to crack. The strength of the size may be determined by the state of the wood. In cheap deal some parts are much more porous and open in texture than other. In such cases the size should be strong. It should be applied warm to the wood, but only a very thing coat should be brushed on. Japanner’s gold size and turpentine mixed in equal quantities, and oil varnishes are sometimes used for the same purpose as glue size, and are useful in preventing the absorption of soft and spongy woods. But it should be remembered that hard and nonporous woods need no preliminary coats before applying stains, as these tend to defeat the very purpose for which stains are put on – the penetration of the wood. Before applying a water stain, a stopping made from equal parts of finest plaster of paris and whiting should be used.
|
|
Putting on the Stain. For applying satin a good hog-hair brush should be used, and there is nothing better for the purpose than a ready ground oval varnish brush. If you are not quite sure of the colour, it is best to experiment in the first place on a square piece of wood or the inside of a cupboard door. Effective staining needs speed and ready brush-work. Water, spirit, and varnish stains all dry very quickly, and the work must be so done that not more than one edge needs to be kept “alive” . In other words, another brushful must be applied before the previous one has had time to set, otherwise the work will look patchy and show the joinings. Oil stains are the easiest to work with, as they are of a very slow-drying nature. They therefore present no difficulties. But the other stains mentioned must, if they are to be applied with success be put on in a methodical and prearranged way. To begin, as the amateur often does, in the middle of a panel, and then fill it in on both sides until the mouldings are reached is to invite failure. For in this way there are two edges to be kept alive, and the operator will find great difficulty in avoiding with the brush places that are already partially dry. The best method is to begin at one side near the moulding, and then to apply a new brushful to the edge of the part just stained. In this way there is only one edge to keep alive, and unsightly smudges are avoided. The following points should be noted by the inexperienced: Avoid brushing out the stain. Always work with a fairly filled brush. Do not retouch. In staining a door, a skilled operator can work down stiles, rails, and moulding, but the beginner should not attempt this, and it is better to do the moulding first, then the rails, and finally the stiles. Care should be taken in finishing the tops and bottoms of panels, as often, when the panel is finished, it is found that these parts are lighter than the rest. To obviate this the brush should be moved lightly upwards towards the moulding and downwards towards the bottom.
Stippling. Oil stains are the best for the beginner to practise with, as they dry slowly. If they are applied too freely they run, especially with a hard non-porous wood. If new wood is used, the oil is absorbed before “running” can take place. Where there is a tendency to this, the stain should be stippled as soon as applied. Stippling is quite a simple operation that requires no special skill, and is done by dabbing the stain evenly all over with a dry brush. The ends of this brush should be strong and square.
|
|
General Hints For Staining. Spirit stains evaporate very quickly, and are therefore suitable only for fretwork, small surfaces like little pieces of furniture, and picture frames. They should not be used for large plain surfaces. For these oil stains are the best. Don’t use good-quality brushes in stains that contain chemicals such as soda or lime. This class of stain destroys the bristles. If large surfaces are to be covered with a chemical stain, use a sponge. Beaumontage, or hard stopping, is commonly used for filling up nail-holes, or other breaks in the wood. It is made of equal parts of beeswax and resin to which a little shellac is added. These are melted together in an iron ladle. To these a colour to match the stain is generally added. Beaumontage can be bought ready-made in sticks similar to sealing-wax. Stainers can obtain very artistic effects by the use of coloured fillers. These consist of ordinary transparent silex fillers mixed with a dry pigment to colour them. When these are rubbed into the wood after a coat of stain, the pores and open parts of the grain appear in colour, and the hard part of the wood retains its natural appearance. To those who have studied colour effects and have artistic taste, this method should make a strong appeal.
|